

AI agents are only as capable as the tools they can use.
In Moltin, your workflows don't operate in a vacuum. They need to pull data from your CRM, search the web for current information, analyze files your team uploaded, or connect to your company's internal APIs. That's where Skill Tools come in.
This feature turns your AI agents from isolated processors into connected systems that can interact with the rest of your tech stack. Admins can browse a catalog of pre-built integrations, install third-party tools with a few clicks, or build custom connections to proprietary APIs using OpenAPI specifications.
Once a tool is installed in your workspace, every workflow can use it. No redundant setup across multiple workflows. No reinventing the wheel every time you need to query Salesforce or send a Slack message. Install it once, use it everywhere.
Editor Tools
When in the Editor, the Tools screen is where you manage every integration available to your workflows. Think of it as your workspace's toolbox. Every tool you've installed lives here in a single list.
Benefits
Having a centralized view of installed tools solves a problem that plagues most automation platforms: tool sprawl. Without a dedicated management screen, you'd have no idea which integrations are already set up, which workflows are using them, or whether you're about to install a duplicate. The Tools screen prevents that chaos.
When you open the Tools screen from the Workflow Editor's top navigation menu, you see exactly what your agents can access. This matters when you're building new workflows. Instead of wondering whether the Stripe integration is already configured, you can check the Tools screen in seconds. If it's there, you're good to go. If it's not, you know you need to install it.
This centralized approach also simplifies maintenance. When an API key expires or authentication credentials need updating, you know exactly where to go. Update it once on the Tools screen, and every workflow using that tool picks up the change. No hunting through dozens of individual workflow configurations to update the same credential fifty times.
How to Access the Tools Screen
Open any skill in the Skill Editor. You'll see the canvas where you build and design your agent’s skills. At the top of the canvas sits a navigation menu. Click the link labeled Tools. The Tools screen appears, showing a list of every tool you've already installed.
This list displays each tool's name and key details. You can scan it quickly to see what's available. If you've got nothing installed yet, the list will be empty. That's fine. You're about to change that.
Adding Pre-Built Tools
Pre-built tools are ready-made integrations for popular services. Moltin's catalog includes hundreds of options covering everything from communication platforms to finance systems.
Benefits
Pre-built tools save you from writing custom integration code. Someone already did the work of mapping API endpoints, handling authentication flows, and documenting available actions. You just install it and start using it.
The catalog organizes tools into categories: Communications, Finance, Human Resources, IT & Engineering, Logistics, Operations, Productivity, Safety & Compliance, Sales, Transportation, Weather, and more.
If you're looking for a specific type of tool, filtering by category narrows your options fast. Need a CRM integration? Check Sales. Looking for a chat platform? Hit Communications. There's also an All Apps view if you want to browse everything, and a Custom Apps category for tools you've built yourself.
Each pre-built tool comes with detailed information about what it can do. Before you install anything, you can review supported authentication methods, check the version number, see when it was last updated, and browse the total number of actions (API endpoints) available.
There's also a link to external documentation if you need to verify specific capabilities. This transparency means you're never installing a tool blind. You know exactly what you're getting.
How to Add a Pre-Built Tool
From the Tools screen, click the Add Tool button in the top right corner. The tools catalog opens in a modal window. You've got two ways to find what you need: filter by category or search directly.
If you know the tool's name, type it into the search box. The catalog filters results in real time. If you're exploring options, click on a category filter. Only tools in that category appear. Browse until you find the tool you want.
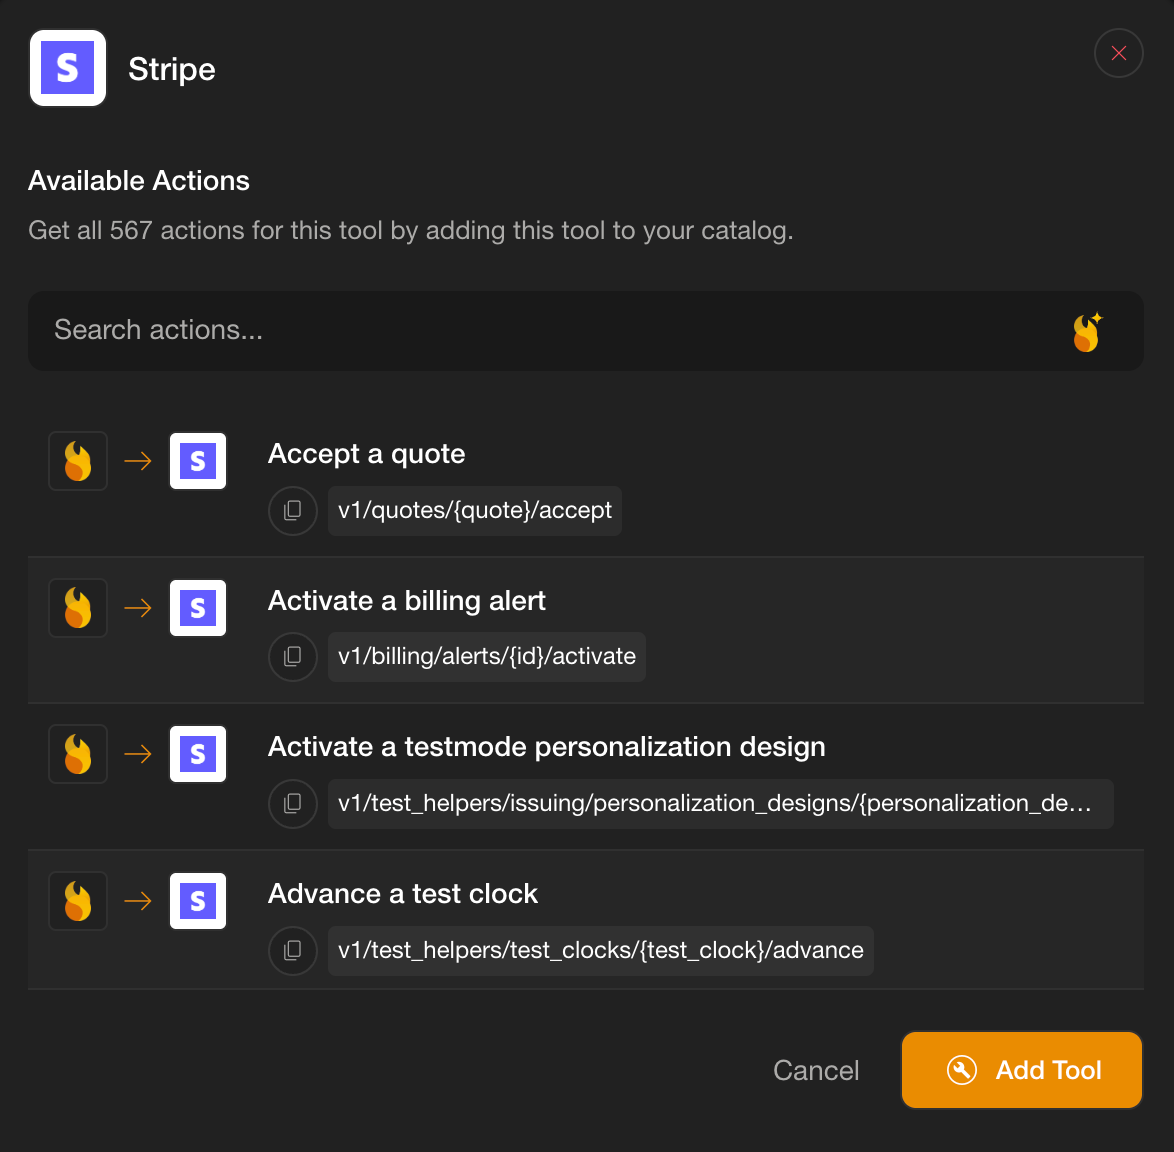
When you spot your tool, click the green Add Tool button next to it. This opens the tool's details panel. Here's where you verify everything before committing.
Check the supported authentication method type to make sure it matches what you've got access to. Review the version and last updated date to confirm it's current. Scan the total actions available to see how many API endpoints the tool exposes.
If you need proof that a specific endpoint exists, scroll down to the actions listing. Every available endpoint is listed there.
The panel also includes an About section describing what the tool does and an external documentation link if you want to dig deeper. Once you're confident this tool does what you need, click the orange Add Tool button at the bottom of the panel.
The Add Tool panel appears next, asking you to choose your authentication type. The options match what the tool supports: Basic Auth, OAuth2, API Key, Bearer Token, or No Auth. Select the one that fits your setup.
Each authentication type requires different fields. For Basic Auth, you’ll enter the API URL, username, and password. For OAuth2, you’ll need the grant type, access token URL, token name, API URL, client ID, client secret, scope, and a few additional options like whether to use authentication headers, plus audience, resource, and header prefix.
If you select Password as the grant type (for ROPC credentials), you’ll also provide a username and password. API Key authentication asks for the API URL, the API key itself, and the API key name. Bearer Token requires just the API URL and the token. No Auth doesn’t ask for anything because, well, there’s no authentication to configure.
Fill out the required fields for your chosen authentication type. Once everything’s entered, click the orange Install Tool button at the bottom of the panel. The tool installs immediately and appears in your Tools screen list.
Every workflow in your workspace can now use it.
Creating Custom API Tools
Pre-built tools cover the popular services, but your company probably runs on some proprietary systems too. Custom API Tools let you connect to any API by uploading an OpenAPI specification file.
Benefits
Custom tools are your escape hatch from vendor lock-in. If your company built an internal inventory system, a custom billing platform, or a homegrown analytics dashboard, you can integrate it into Moltin without waiting for someone to build a pre-made connector. As long as you've got an OpenAPI spec file, you can make it work.
This flexibility extends to niche third-party services too. Not every SaaS tool gets the pre-built integration treatment. If you're using a specialized compliance platform or a regional payment processor that isn't in Moltin's catalog, build a custom tool. The process takes minutes if you've got the spec file ready.
Custom tools also give you control over how the integration is configured. You define the app name, choose the authentication type, set the API base URL, and provide a documentation URL.
Once created, the custom tool behaves exactly like a pre-built one. It shows up in your Tools screen, becomes available to all skills, and can be managed or deleted just like any other tool.
How to Create a Custom API Tool
From the Tools screen, click Add Tool. When the catalog modal opens, you'll see a button labeled Create Custom Tool. Click it.
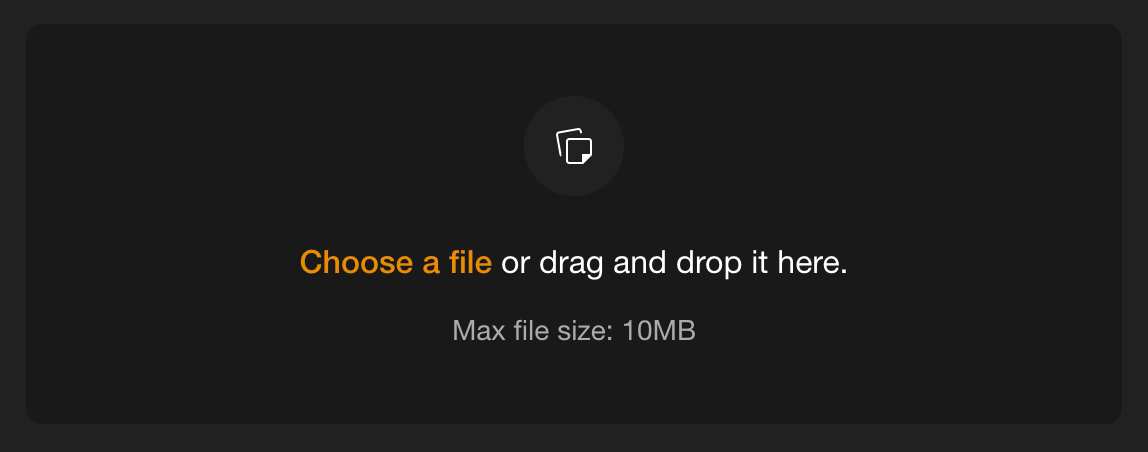
The Create Custom API Tool panel slides open. This is where you'll upload your OpenAPI specification file and configure the tool's settings. The file must be in YAML or JSON format with a .yml, .yaml, or .json extension.
If you don't have a spec file handy or need to see what one looks like, Moltin provides two sample templates. Click Download Sample YAML File or Download Sample JSON File to grab a template you can modify.
Once you've got your spec file ready, upload it to the panel. Then fill out the required fields. App Name is whatever you want to call this tool. Make it descriptive so you'll recognize it later in the Tools screen. Auth Type gives you the same options as pre-built tools: Basic Auth, OAuth2, API Key, Bearer Token, or No Auth. Pick the one your API uses.
API Base URL is the root URL for your API. This is usually something like https://api.yourcompany.com. Documentation URL is optional but helpful. If your API has public or internal documentation, link it here so other admins know where to find details about endpoints and parameters.
After filling out these fields, submit the form. Moltin processes your OpenAPI spec file and creates the custom tool. It appears in your Tools screen alongside pre-built tools. Any workflow in your workspace can now access it.
Managing Installed Tools
Tools don’t just sit in your workspace forever unchanged. Authentication credentials expire. APIs get deprecated. Sometimes you realize a tool isn’t needed anymore and you’d rather clean up the clutter.
Benefits
Being able to delete tools matters more than it sounds. Over time, workspaces accumulate integrations that no longer serve a purpose. Maybe you switched CRM platforms and the old integration is just sitting there. Maybe a tool was installed for a single experimental workflow that never made it to production. Deleting unused tools keeps your Tools screen manageable and reduces the chance of confusion when building new workflows.
The deletion process is straightforward, but Moltin doesn’t let you shoot yourself in the foot without warning. If you delete a tool that’s currently being used by active workflows, those workflows will error out when they try to execute. That’s expected behavior, but Moltin notifies you when it happens so you’re not left wondering why a workflow suddenly broke. This notification system means you can delete tools with confidence, knowing you’ll be alerted if something goes wrong.
How to Delete a Tool
From the Tools screen, locate the tool you want to remove. Click on it to open the tool’s details. Somewhere in that panel (the exact placement varies, but it’s usually near the top or bottom) you’ll find a delete or remove option. Click it.
Moltin will likely ask you to confirm the deletion. This is your last chance to back out. If you’re sure, confirm. The tool disappears from your Tools screen immediately. If any workflows were using that tool, they’ll fail the next time they run and you’ll receive a notification explaining what happened. At that point, you can either reinstall the tool or modify the affected workflows to use a different integration.
Install Once, Use Everywhere
Most automation platforms make you configure integrations separately for each workflow. That’s tedious and error-prone. Moltin takes a different approach. Install a tool once in your workspace and it becomes available to every workflow.
Build a new workflow that needs to query your database? The database tool is already there. Create a customer support workflow that needs to send Slack notifications? Slack’s already installed.
This workspace-level approach scales better as your automation needs grow. With five workflows, the difference between per-workflow configuration and workspace-level installation is annoying but manageable. With fifty workflows, it’s the difference between a maintainable system and an unmaintainable mess. When that API key needs updating, you change it in one place instead of fifty.
The Tools screen, the catalog, and the custom tool builder all serve this philosophy. Make it easy to install. Make it easy to browse what’s available. Make it easy to connect proprietary systems. Then get out of the way and let your agents do their work.